The iPad mini 3 is a small tablet with a glass front, and most of its damage lands on the panel and the cell underneath. Here is what usually brings one to our bench.
The cracks, lines and dead spots people notice first
A dropped mini 3 most often shows a spiderweb crack in the corner, and if the LCD underneath is intact the picture stays clean while touches stop registering in a strip of the display. The device separates its touch layer from the LCD matrix, so a shattered top surface can leave the image readable and still make the tablet unusable, because the digitizer no longer senses a finger. A hard knock on the aluminium body also bends the frame by a fraction of a millimetre, and that bend lets a new layer sit unevenly later. Lines across the screen or patches that stay black point to the matrix rather than the top surface. Cracks spread with every press, so a chipped corner that still works is worth showing to a technician before the front fractures across the whole panel.
When the tablet will not power on or hold a charge
- Cable and charger: swap both for a known working pair first, since a tired Lightning cable mimics a dead device.
- Lightning port and flex: the connector collects lint and its flex cracks after years of angled plugging.
- Power pack: a cell that has lost capacity reads as a charging fault, because the unit boots and shuts down within minutes.
- Power controller: only after those three are cleared does the fault move to the board.
A swollen battery pushing the screen away from the frame
When the front panel on a mini 3 lifts along one edge and the device rocks on a flat table, the cause is almost always a swollen cell pressing up from inside. The cell is glued into the aluminium body, so as it expands it has nowhere to go but against the display assembly, and the gap at the frame edge grows by a millimetre or two over weeks. Owners often read that lift as a panel that came unglued after a fall, which is why the swelling gets missed until the assembly itself starts to distort. A swollen cell should not be charged or pressed back into place, because the pouch can rupture and the adhesive under the front is already compromised.
Glass or full display module for iPad mini 3 repair
The mini 3 sits on the older side of the line, where the touch layer and the LCD are separate parts. That single fact decides which repair is possible and how long it takes.
Why the mini 3 can take just a new glass layer
On this tablet the touch layer and the LCD matrix are separate components, so a cracked front with a clean, evenly lit picture can be fixed by replacing the top layer alone. The digitiser sits above, the matrix underneath, and the two are not bonded into one sealed unit the way laminated panels are. That is why a spiderweb crack over a perfectly working image is the quickest case on this device. The panel is glued into the aluminium frame with a strip of adhesive, so removal needs controlled heat from a heating plate to soften that bond. A cold pry lifts the surface unevenly and drags the matrix with it, turning a simple job into a full module swap.
Keeping Touch ID and the Home button working
We transfer the original Home button with its Touch ID sensor from the old panel to the new one, because that sensor is paired to the logic board and a replacement part would leave the fingerprint reader dead. The pairing is set at the factory and there is no software step that re-links a foreign component to the board. So it has to travel: we lift it off the cracked surface, keep the original flex intact, and seat it into the new front before the adhesive cures. The same applies to the bracket and gasket around it, which keep dust out of the opening. Ask any workshop whether the button travels with the screen before you agree to the job, since a swapped sensor shows up only after you set the tablet up again.
Comparing the display options for this model
Three front repair routes side by side| Work | What is replaced | Time at our bench |
|---|
| Glass only | Touch layer and adhesive, original LCD kept | 1–2 hours |
|---|
| Glass and LCD together | Both layers, frame cleaned and re-glued | 1–2 hours |
|---|
| Full front assembly | Pre-bonded glass and matrix unit | From 1 hour to 1 day |
|---|
Battery, Charging and the Lightning Port
Power faults are the second most common reason a mini 3 comes in. The cell is glued under the display, so even a straightforward swap starts with lifting the glass.
Why the battery is not a home job on this tablet
The power cell in an iPad mini 3 is bonded to the chassis beneath the display, so reaching it means heating and lifting the glass first, which is why we do the swap at the bench rather than suggest a kit. The adhesive runs around the full perimeter of the panel, and the glass on this generation is thin enough that a heat gun held too close will leave a yellow patch that never clears. On our heated platform the panel comes up evenly, the old cell is pried out with plastic tools, and the new one is seated before the adhesive is refreshed. A cell that has already swollen changes the removal sequence, because the glass is under tension and comes up unevenly if heat is applied too fast — bring a bulging mini 3 in before the frame bends.
Tracing a charging fault from cable to board
- Cable and adapter: swap both for a known working pair, since a tired Lightning cable fails far more often than the tablet itself.
- Lightning port and flex: inspect the socket under magnification for bent pins, corrosion or a torn flex, then clean and reseat.
- Power pack: measure the cell under load, because a worn pack can refuse charge and mimic a dead port.
- Power controller: test the charging IC on the logic board last, since this is the step that needs microsoldering rather than a part swap.
Sudden shutdowns and a battery that drains overnight
Shutdowns at thirty or forty percent and a tablet that loses charge on the nightstand point to a worn cell rather than software, and the health readout alone does not settle it. A cell that has aged unevenly can report a healthy percentage and still cut out under load, so the diagnosis is a discharge test rather than the settings screen. We run that test free of charge and in front of you, and the engineer shows you the voltage drop as the tablet is pushed. iPadOS background refresh, a stuck app or a failing power controller can drain a pack too, so the cell is measured before anyone quotes a replacement.
How We Run an iPad mini 3 Repair in Almaty
The order of steps matters as much as the part itself. Here is the sequence a mini 3 goes through from the first message to the moment it leaves with you.
From a photo on WhatsApp to a fixed quote
Send a photo of the damage on WhatsApp and an engineer replies within five minutes with a price and a free slot, then confirms the price, the part, the turnaround and the warranty on the receipt ahead of any work. You choose between an original component and an aftermarket one at that point, and both are listed on the paperwork with the same clarity. The receipt takes about two minutes to prepare and you keep a copy from the start. Every iPad mini 3 repair in Almaty follows this same route, from the first photo to the fixed quote on paper. A quote taken from a photo is only as good as the photo, so shoot the whole front panel in daylight rather than a close-up of the crack.
Diagnostics in front of you and the part in its packaging
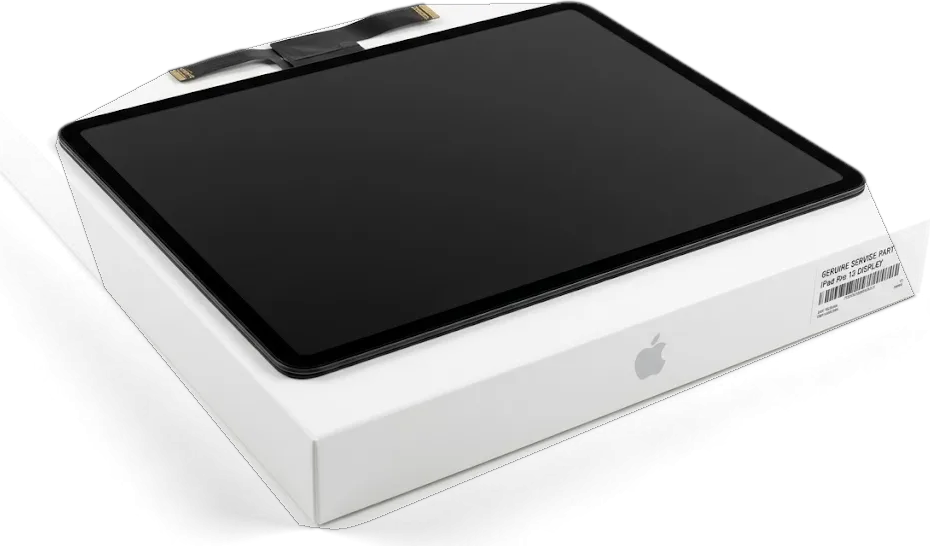
Diagnostics take fifteen minutes and happen in front of you, the engineer shows what is broken, and the new module is opened from its factory packaging ahead of installation. This check is free even if you walk away without booking the job, so nobody pays to learn what failed inside the tablet. The engineer points at the damaged spot on the bench rather than describing it from memory, and you see the old piece come out as the replacement goes in. Watching that swap is the simplest way to know a working unit was not quietly exchanged for a used one.
How long a mini 3 stays with us
- Glass and battery work: a display layer or a cell on this tablet is usually finished the same day, and 72% of jobs are done while the owner waits in the seating area with coffee and Wi-Fi.
- Full display module and general iPad service: most tablet work runs from an hour to a day, so a mini 3 booked in the morning often goes home by the evening.
- Board-level repair: micro-soldering under a microscope takes one to three days, and after water contact diagnostics alone can stretch to two days before we quote anything.
Original Part or Aftermarket and What the Warranty Covers
Two mini 3 tablets with the same crack can leave with different components inside. The choice is yours to make, and it helps to know what actually changes.
What differs between an original part and an aftermarket one
An original part matches the factory fit, colour and touch response, while an aftermarket glass or cell is a compatible copy that can differ in brightness, adhesive strength and how long it holds a charge. We show the new component in its factory packaging before installation, so you see exactly which of the two is going in. Of the tablets that pass through our workshop, 64% of customers pick an original part, and the rest choose a copy to keep the bill lower. The gap is widest on the glass layer: a cheaper copy usually feels a little less smooth under the finger and collects fingerprints faster, while a copy cell tends to lose capacity sooner in cold weather. Ask to compare both options in your own hand before you commit.
The checks we run before handing the tablet back
- Touch across the whole panel: drag a finger along all four edges and each corner, since a dead strip near the frame signals a badly seated panel.
- Cameras and microphones: open the camera front and back, then record a short voice memo and play it back to confirm both mics work.
- Speakers and buttons: play a track at full volume and press every key, including the volume rocker and the sleep button.
- Charging and network: plug in the Lightning cable, watch the charge icon react, then load a page over Wi-Fi to confirm the wireless module connects.
- Final handover: we return the tablet with the receipt, the warranty card and the old component, and you repeat these checks with the engineer.
What the warranty card actually promises
Every repair leaves with a warranty of up to 1 year, a warranty card and the old part, and payment can be made by Kaspi, bank card or cash. The document names the component we fitted, the date and the term, so there is no argument later about what was covered. The receipt matters just as much: it carries the serial number of your tablet, and the warranty is tied to that specific component rather than to the visit as a whole. Keep both documents together in the box, because a claim without the receipt slows the process down while we trace the record. If the same fault returns inside the term, the item is replaced under that card at no extra charge.
Summary: iPad mini 3 repair
A few facts decide whether a cracked mini 3 needs a new front layer or a full module, and whether a trip to a workshop is worth it.
- Two layers, two outcomes: the mini 3 pairs separate touch glass with its LCD, so a clean picture under a cracked surface often means a glass-only job.
- Touch ID travels: the Home button is paired to the logic board and must move to the new pane intact, or the fingerprint sensor stops working.
- Swollen cell first: a cell that lifts the screen is a safety issue, so stop charging the tablet and get it seen before the damage spreads.
- Charging order: faults are traced from cable to Lightning port to battery to circuitry, which is why a cable swap is the first thing to rule out.
- Backup and Apple ID: save your data and confirm the Apple ID password before handing the tablet over, since activation locks follow the hardware.















 MacBook
 iMac
 Mac mini and Studio
 Apple Watch
 AirPods
 Apple Pencil
 Apple TV
 HomePod