We begin iPad repair in Astana from the symptom you describe, never from a guess. The symptom points to one specific unit — panel, digitizer, flex, battery or port — and that unit decides what repair is even possible.
Cracked Glass That Still Responds to Touch Input
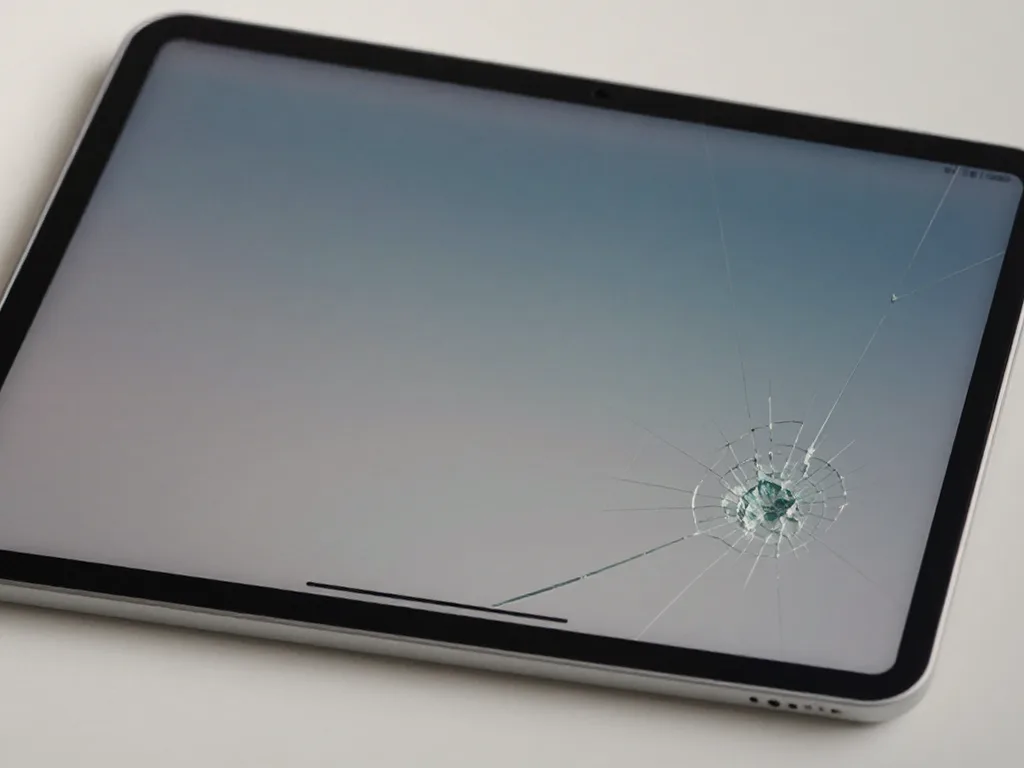
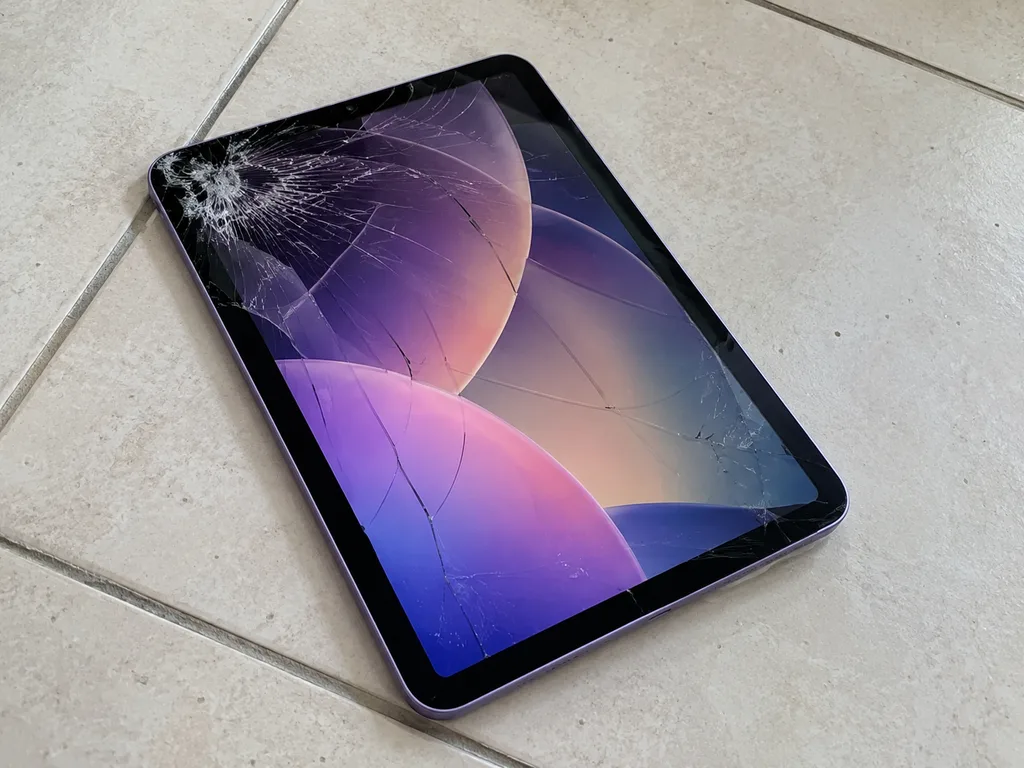
When the top layer is cracked but touch and image still work, the LCD matrix is usually intact and the damage sits in the outer sheet only. We see this most often after a fall where the aluminium body took the impact and the display escaped the shock. The digitiser still registers every finger, colours stay even across the whole panel, and there is no dark patch creeping in from a corner. A crack keeps spreading with every press, and dust works its way under the surface — so a chip that looks harmless today is the cheapest moment to deal with it.
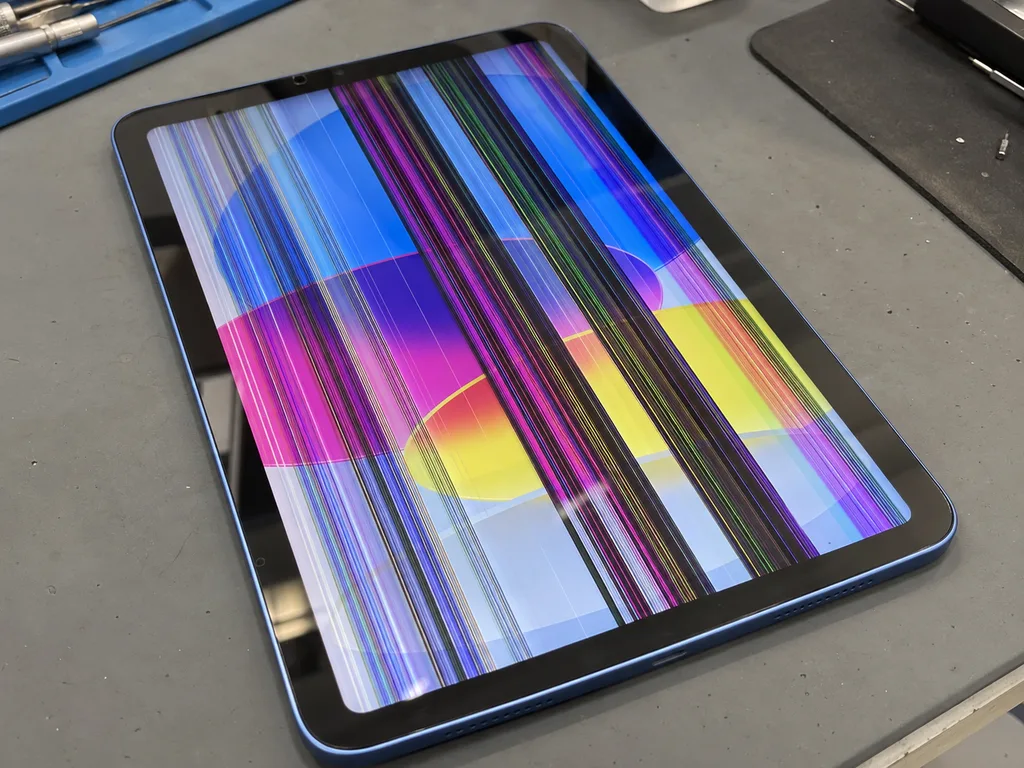
Stripes, Spots and a Display That Ignores Touch
Vertical stripes, dark patches or a dead touch zone point at the matrix or the display flex rather than the outer sheet, and that changes the whole repair. A line that stays in the same place when you rotate the screen is a panel fault; a strip that stops responding along one edge usually traces back to a pinched or worn connector tail. A screen that shows an image but ignores fingers is not a software bug — a restart will not bring the sensing layer back, and every extra day of pressing on a damaged conductor widens the fault until the whole module has to go.
If the Tablet Gives No Sign of Life or Refuses to Charge
- Cable and adapter first: we test the charger and cord on another device before touching the tablet — a dead adapter is the most common false alarm.
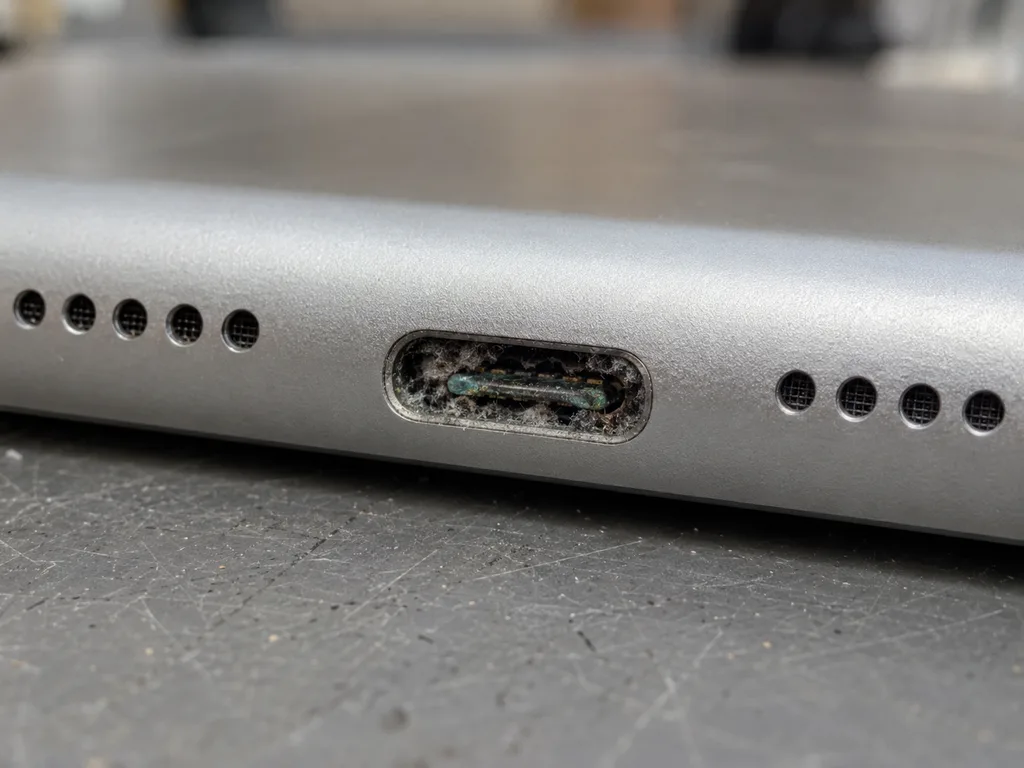
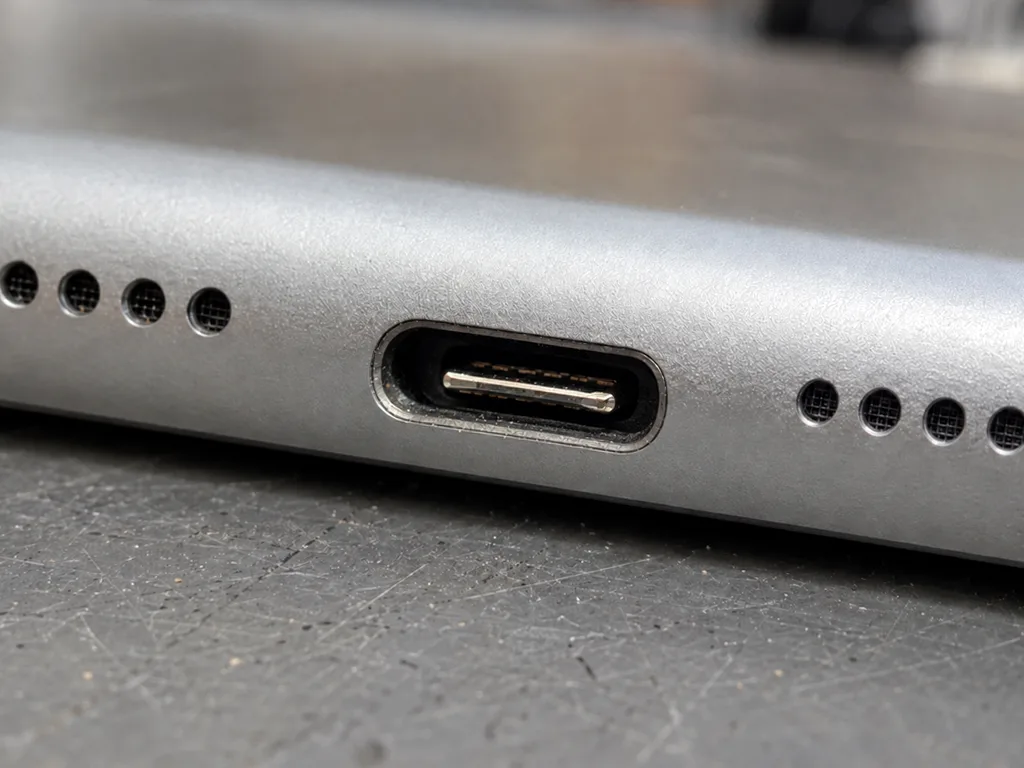
- Port and its flex: the Lightning or USB-C connector collects lint and bends at the pins, so we inspect it under light and check the tail behind it.
- Battery: a worn cell reads low voltage under load, which explains sudden shutdowns at 30 % and a tablet that boots again after a few minutes on the charger.
- Power controller: only if the first three check out do we move to the board, where the power IC sits next to the charging circuit.
Glass Only or the Whole Module for Your Generation
On some tablets we replace only the glass; on others the whole module goes in. The difference is not the price — it is how the display is bonded on your generation.
Which Models Allow a Glass-Only Replacement at the Bench
On iPad 2, 3, 4, 9 and 10, the first iPad Air, and mini 1–3, the glass and the matrix are distinct layers — that means you can replace just the glass as long as the matrix remains intact. The digitizer sits above the LCD with an air gap between them, held by a frame of adhesive, and nothing bonds the two surfaces together. That is why a cracked top layer on these generations does not touch the image underneath: the picture stays clean, the touch layer keeps working, and only the outer sheet has to come off. The older the model, the more brittle the glass sits in its frame — heating and lifting it is the risky part, not the replacement itself.
Where the Display Is Laminated and the Module Goes Whole
Starting with iPad mini 4 and iPad Air 2, plus every iPad Pro, the matrix and glass come bonded as one module — that is why the display gets swapped as a single unit. The adhesive layer fills the gap completely, which is what kills reflections and lets the Apple Pencil read the surface without a visible offset. On the 12.9-inch Pro the backlight is mini-LED, and that assembly cannot be separated from the front glass at a bench. Trying to split a laminated module to save the matrix usually ends with a dead touch layer — that is why a glass-only offer on these models is a warning sign, not a bargain.
Touch ID and the Home Button After a Display Swap
Touch ID ties the Home button to the board, so rather than installing a fresh button we transfer the original one to the replacement screen. The pairing lives in the button itself, not in the display, so the part that carries the fingerprint stays with the device through the swap. If a workshop offers a display with a new button already in it, expect Touch ID to stop working — the pairing cannot be recreated by swapping components. Before handing the tablet in, back up your data, and after the repair check the touch layer, the image and the Home button together with the engineer.
Our iPad Repair Process in Astana
The process is the same for every model: a photo and a free check first, then a fixed receipt, then the work itself — and no step starts until you have agreed to it.
Two Minutes From Your WhatsApp Photo to a Locked-In Receipt
Send us a WhatsApp photo showing the damage; within 5 minutes an engineer answers with a price based on the shot and offers a free time slot; then, in 2 minutes and before any work begins, the price, part, turnaround and warranty are locked in on the receipt. Those free diagnostics last 15 minutes and are carried out while you watch: the engineer takes the device apart, points out the fault and describes what the swap involves, even when you choose not to proceed. Our tablet repair follows that order on every unit, so you know the number before the device goes on the bench rather than after. Here is the full path of the job, from your first message until the tablet is finished.
The New Part in Factory Packaging and the Old Part Back
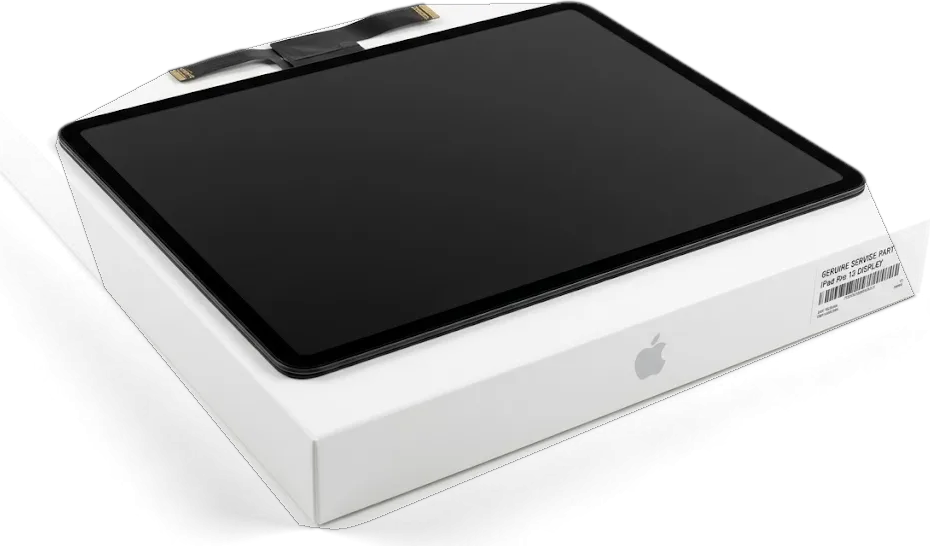
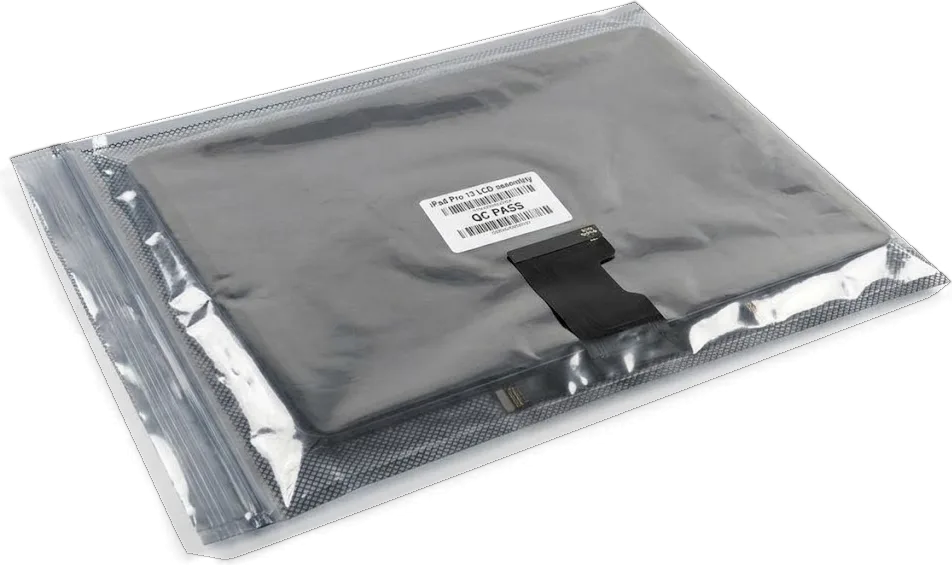
We show the new component in its factory packaging before installation and hand the old one back with the device, together with the receipt and the warranty card. That matters when you have chosen between an original and an aftermarket screen: the sealed packaging tells you which one is going in, and the removed unit lets you see what came out. Coverage lasts 1 year for both the work and the component; before anything is opened, the terms go onto the receipt — they are not promised later. Keep the old display or battery until you have used the tablet for a few days — it is the physical record of what was actually inside your device.
The 32-Point Check You Run Together With the Engineer
- True Tone: tilt the screen to confirm the tint shifts.
- Cameras and microphones: take a shot with each lens and record a short voice note.
- Speakers and charging: play a track at full volume and watch the charge indicator respond.
- Network and touch: make a call on a cellular model and drag an icon across every corner.
- Your own files: open your photos and notes, since daily apps catch faults generic tests miss.
- The engineer's list: the full 32-function run takes about 10 minutes and happens beside you.
Choosing an Original Component or Aftermarket Part for Your iPad
The choice of component is the one decision that stays with you, not with us. We show both options and explain what each one changes in daily use before any work starts.
How an Original Display Differs
An original display keeps True Tone, the colour profile and Apple Pencil response exactly as they were, and 64% of our customers choose the original component. With a laminated model, display, digitizer and glass come as a single module, so the swap brings back the factory stack instead of changing one layer. True Tone reads the ambient light sensor and adjusts white balance in real time, which is why a genuine panel tracks a warm room and a bright window the same way it did on day one. Pencil pressure curves and palm rejection are calibrated to that panel too. With a laminated model, the gap is obvious within the first minute — an aftermarket module frequently drops True Tone, and placing it beside a second device makes the shift clear.
Where an Aftermarket Component Makes Sense
If you understand which features might stay broken, a non-original component is cheaper and makes sense for an aging tablet used mainly for video and reading. The LCD matrix in a budget module usually has a narrower colour gamut, so photos and films look slightly cooler or flatter, and brightness at the top end is often lower. Apple Pencil still draws, but the line can feel less precise at the edges of the screen. Ask what the aftermarket component does to the feature you actually use — a cheaper module is fine for a kitchen tablet and a poor fit for one that runs a drawing app every day.
Comparing the Two Options at the Counter
How the two part options differ in daily use| Parameter | Original part | Aftermarket part |
|---|
| Colour and brightness | Matches factory | Slight shift possible |
|---|
| True Tone | Works | Often unavailable |
|---|
| Apple Pencil response | Unchanged | May feel different |
|---|
| Long-term wear | Predictable | Varies by batch |
|---|
| Warranty | Up to 1 year | 6 months |
|---|
iPad Repair Duration and Whether Waiting Is an Option
Turnaround depends less on the model than on the component involved: screens and batteries are hours, boards are days. We tell you which before work begins, not after.
Repairs You Can Wait For in the Waiting Area
iPad repair typically ranges from an hour up to a full day; in fact, 72% of jobs are completed right while the client stays in our lounge with coffee and Wi-Fi. A battery or screen job on a tablet is often done the same day, and the exact time is named after diagnostics. Work where the module or frame needs extra attention sits at the longer end of that window. First comes a free check: 15 minutes done in your presence, and you may leave with no repair at all. You watch the engineer open the device, see the failed part, and hear the options before anything is agreed. Bring the tablet charged enough to boot — a flat battery adds a charging step ahead of diagnostics and pushes your slot back.
Board Work and Repairs That Run for Days
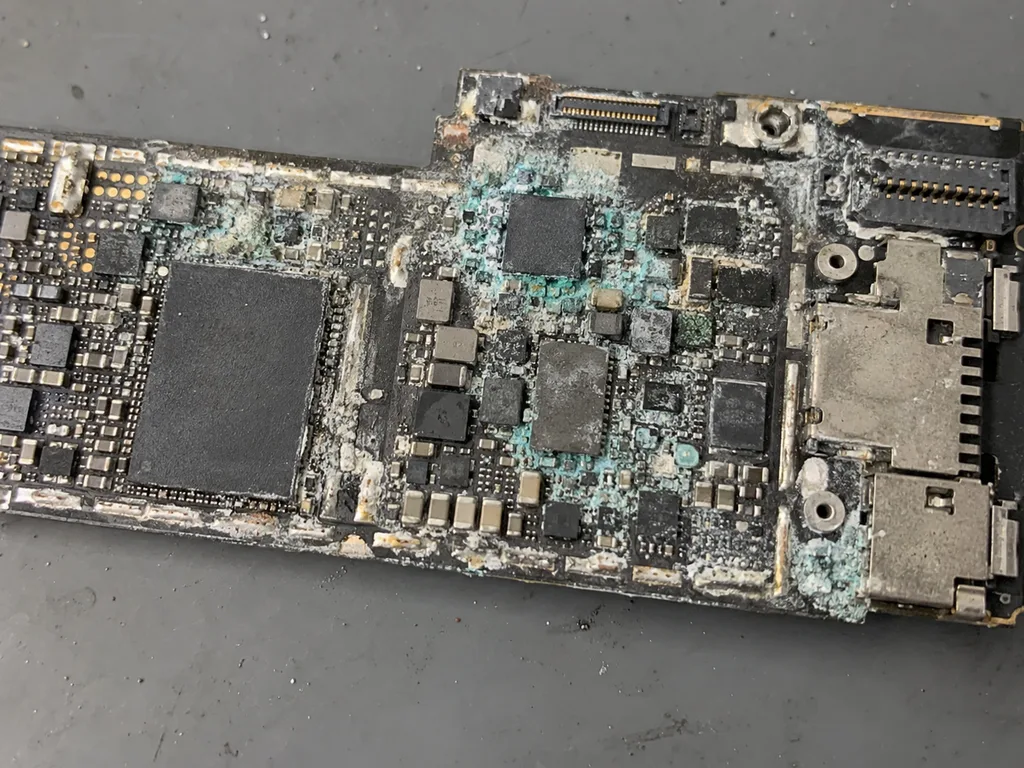
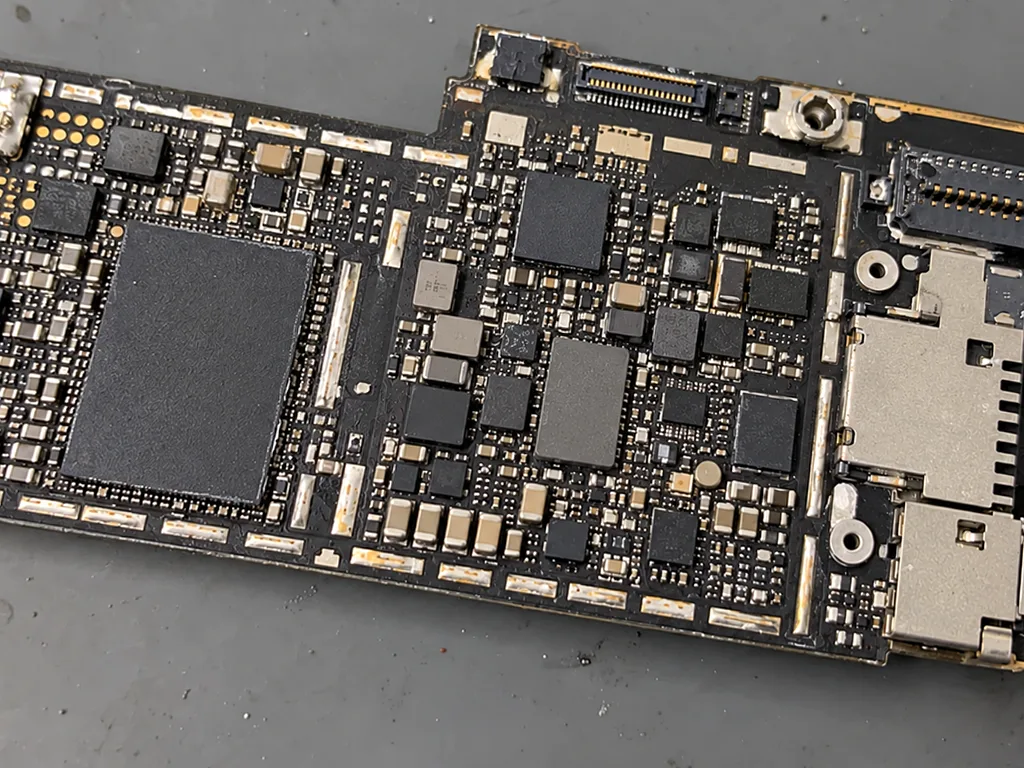
Board-level repair takes 1 to 3 days because it happens under a microscope, and a device that has been in water can need up to two days of diagnostics before we even name a repair. Corrosion spreads under shields and connectors, so the first pass is cleaning and inspection, not soldering. Only after that do we know which components failed and whether a donor board is involved. Before starting, we lock in the cost, the part and the guarantee on your receipt — so any longer timeframe is settled beforehand instead of surprising you when you collect the device. The same rule covers a device with a second hidden fault: we stop, explain, and re-quote instead of guessing at the counter.
Turnaround by Job Type
How long each job typically takes at the bench| Type of work | Turnaround | Done while you wait |
|---|
| Screen module | From 1 hour | Often |
|---|
| Battery | From 1 hour | Often |
|---|
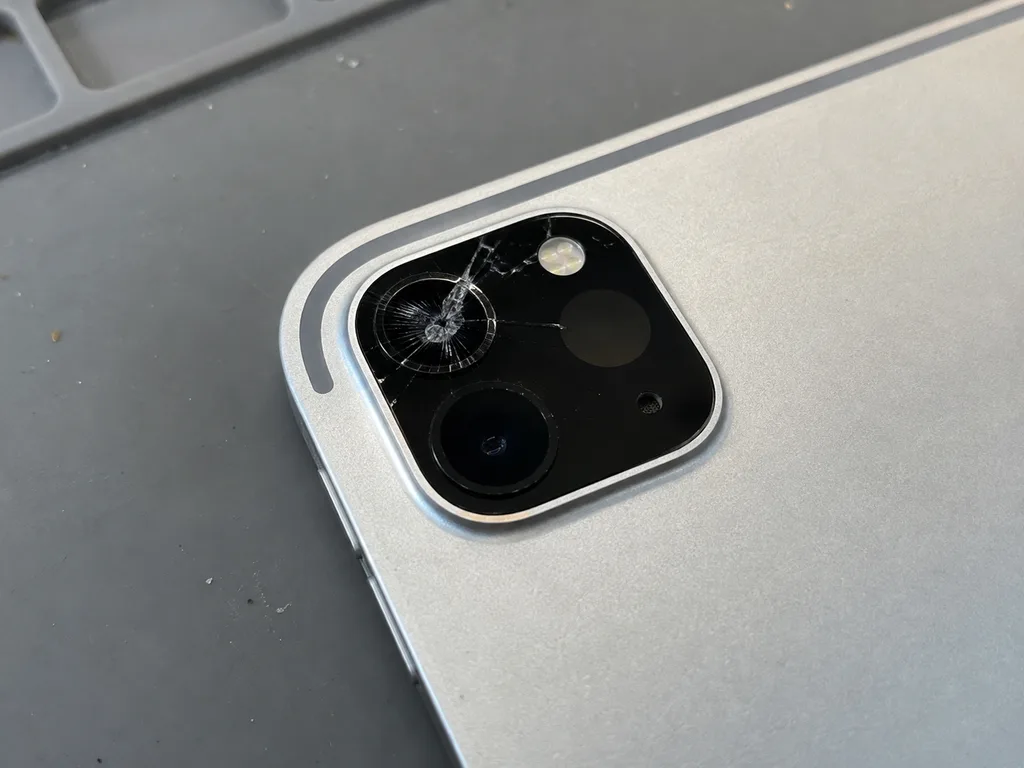
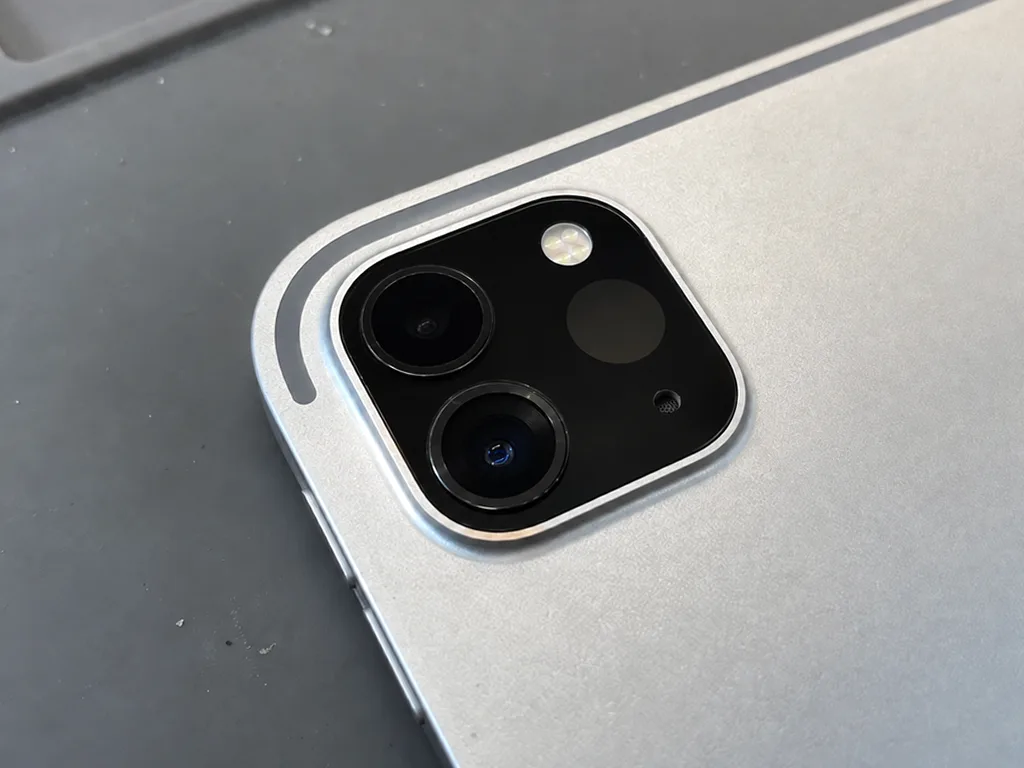
| Glass for camera | From 1 hour | Often |
|---|
| Repair of board | 1–3 days | No |
|---|
| Diagnostics for water damage | 2 days max | No |
|---|
Battery, Charging and the Ports Behind Them
The cell in an iPad sits glued under the display, so every power story starts with lifting the glass — and that is exactly why it should not be handled at the kitchen table.
When the Battery Swells, the Screen Gets Pushed Out
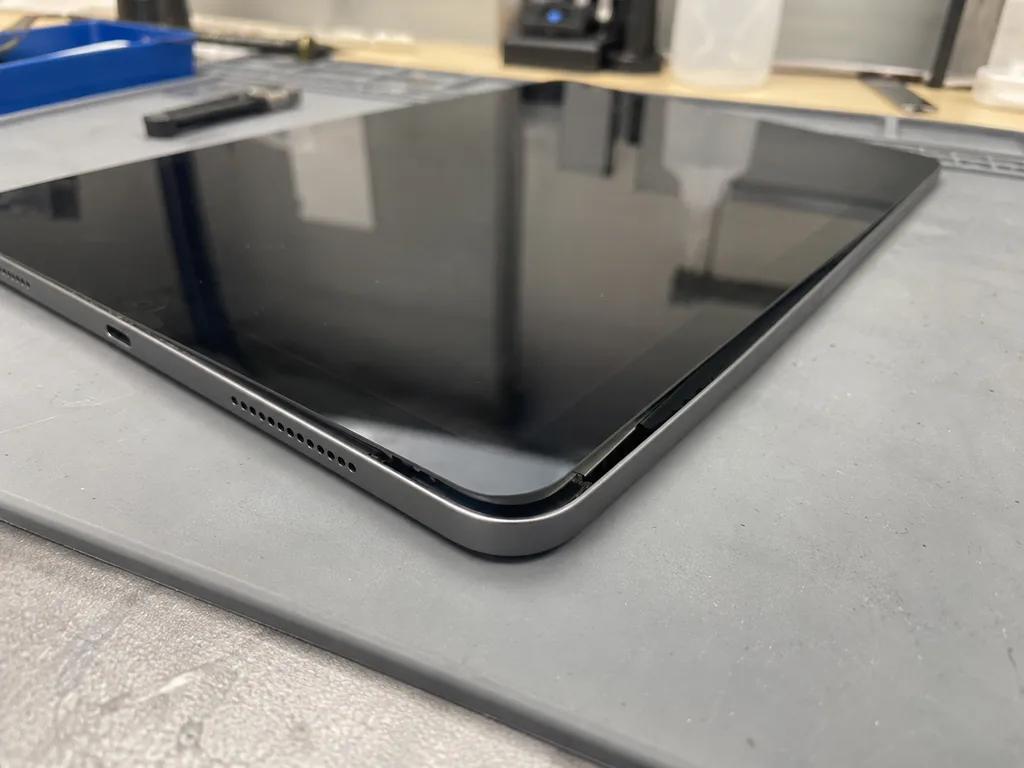
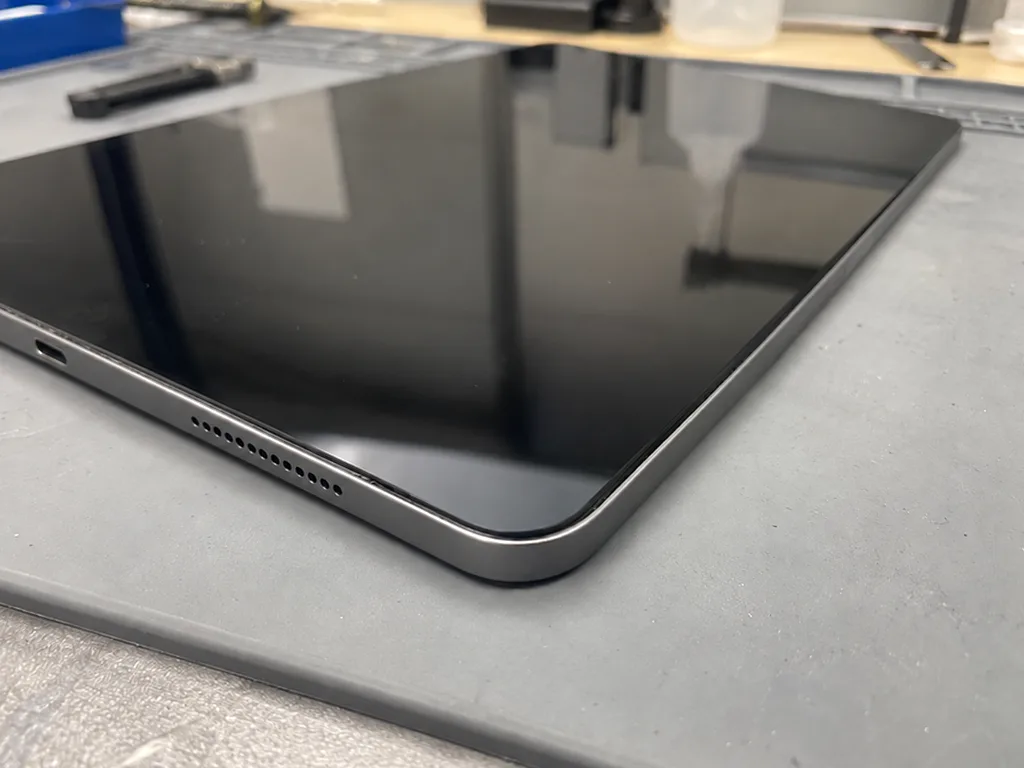
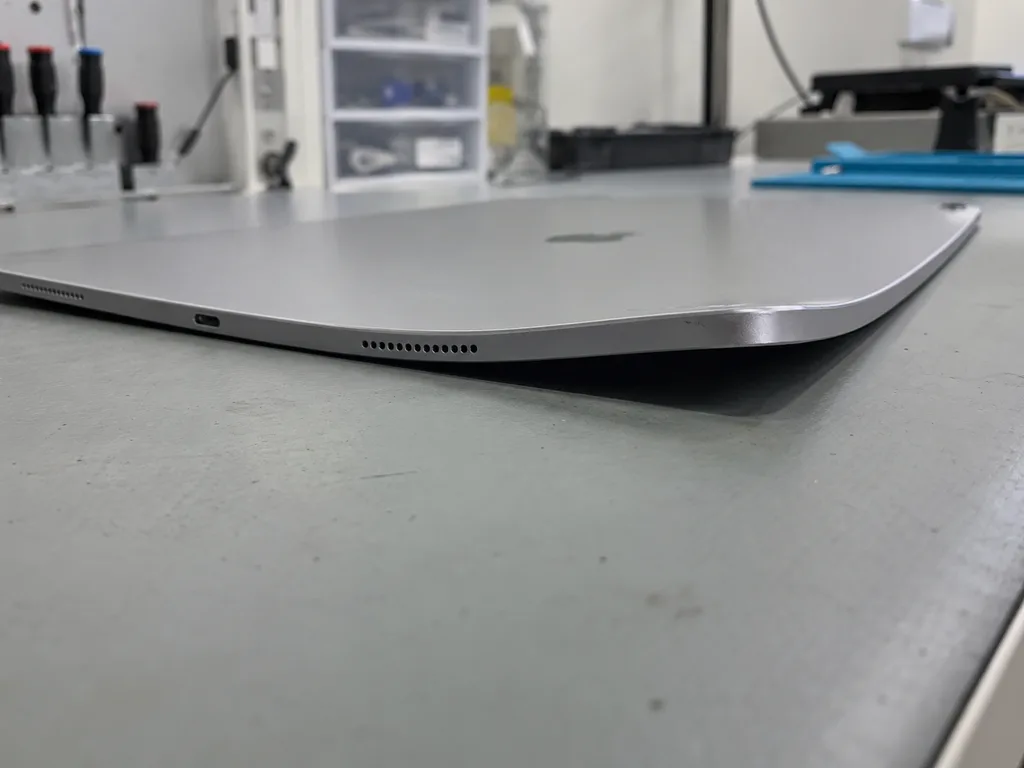
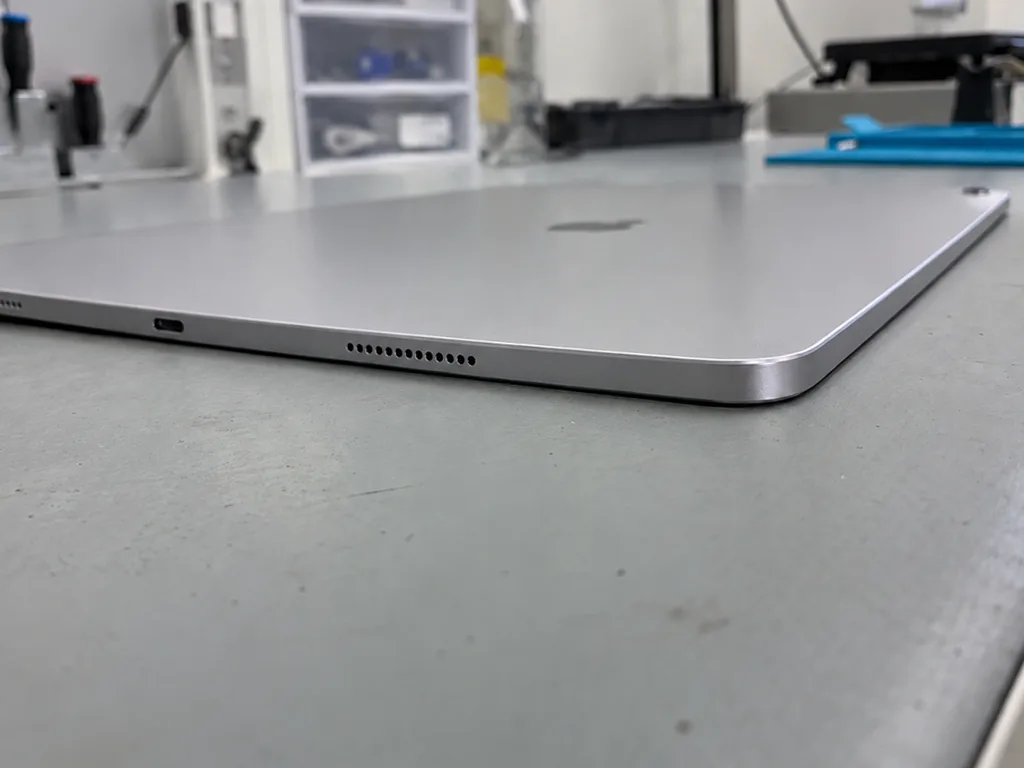
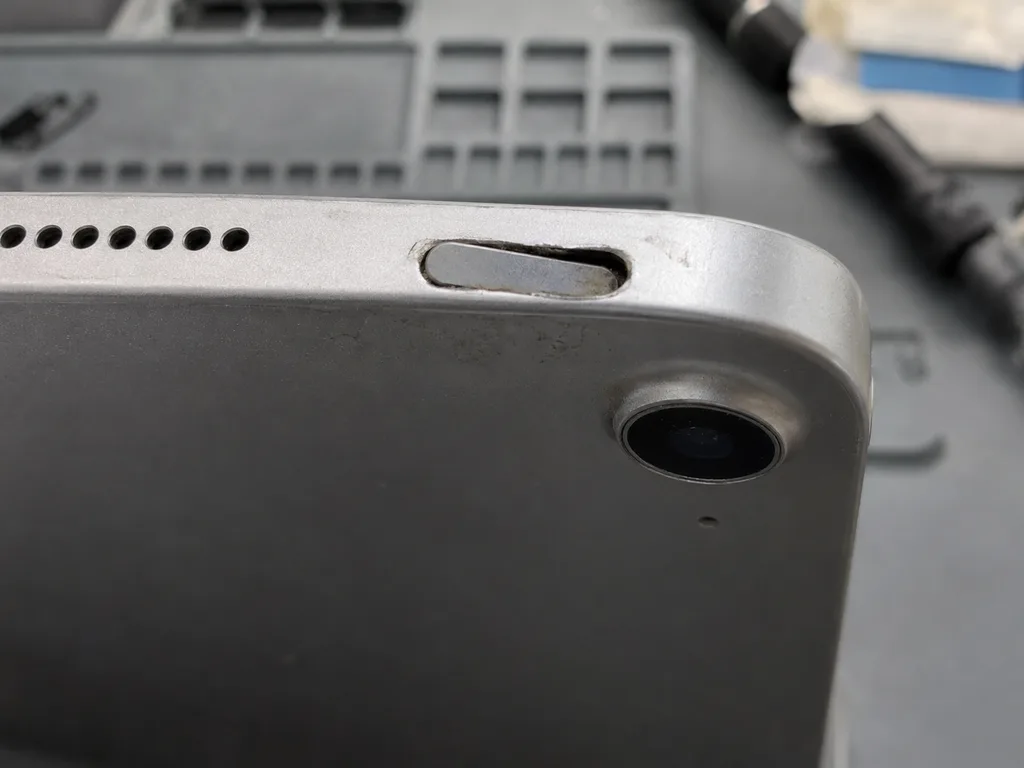
A swollen battery lifts the display away from the aluminium body, and a tablet in that state should not be charged or pressed back together. The cell swells as it ages and vents gas, so the panel bows outward along one edge, the frame no longer sits flush, and the case may rock on a flat table. You may also notice the device shutting down early, a warm patch on the back, or pressure marks in the corners. The gap at the edge is the cell expanding, not the glass coming loose — pressing it down can crack the matrix from the inside, and charging a swollen unit keeps feeding the swelling. Keep it off the charger and away from heat, then have the pack opened and removed.
Why the Battery Is Not a Home Job
The cell is glued under the display, so replacing it means heating and lifting the panel first, and that is the step where a home attempt usually ends with a broken matrix. The adhesive runs around the whole perimeter, the panel is thin and laminated on most generations, and a hair dryer warms unevenly — too little and the glass cracks on the way up, too much and the backlight takes the damage. The pack comes out with the screen on a heated pad and a suction cup, never with a metal lever pushed under the glass. A unit that dies at 30 % is worn, not faulty software — check the cycle count before deciding, because a healthy pack with the same symptom points at the charging circuit instead.
30-pin, Lightning and USB-C Ports and What Fails There
- 30-pin connector: iPad 2 and iPad 3 charge through the wide 30-pin dock port, where the pins flatten with age and the device stops recognising the cable.
- Lightning: iPad 4 through iPad 9, Air 1–3 and mini 1–5 use Lightning, and the usual failure is lint packed into the socket.
- USB-C: iPad 10, Air 4/5, mini 6 and every Pro use USB-C, where the port wears at the tongue and the flex behind it takes the strain.
- What the symptoms mean: charging only at a certain angle points to a worn port or damaged flex, not a bad cable, so swapping cords will not fix a bent contact.
Summary: iPad repair
A few practical points are worth carrying into the conversation, whichever model you bring and whichever workshop you choose to trust with it.
- Generation sets the job: on older models just the glass comes off, whereas iPad mini 4 and iPad Air 2 onward require the whole module.
- A symptom names a node: stripes and dead touch zones are a different repair from a cracked display that still responds.
- A swollen battery is a safety issue: it is not a cosmetic gap, and the device should not be charged in that state.
- Timing depends on the task: iPad and MacBook work runs between one hour and a day, while board-level fixes need 1–3 days.
- Ask for the component in its packaging: plus the old one back and a receipt naming the component, the turnaround and the warranty.
































 iPhone
 MacBook
 iMac
 Mac mini and Studio
 Apple Watch
 AirPods
 Apple Pencil
 Apple TV
 HomePod