A mini fails along a handful of familiar routes — a knock on the corner, a worn battery, a tired charging connector. Here are the symptoms owners actually notice and what each of them points to.
Cracks, dead touch and lines across the display
A cracked mini usually keeps working until the damage reaches the touch layer or the LCD underneath, which is why a hairline crack and a dead strip look identical from outside. The top layer is only the outer skin: below it sits the digitiser that reads your finger and the LCD that draws the image, and both are bonded into a single display module on most generations. A single drop on the corner can shatter that surface and leave the picture perfect, or crack nothing visible and kill a band of touch across the middle. Lines, dark patches or a flickering half all mean the panel itself took the hit. A crack that still responds is worth covering early, because dust and moisture get underneath and turn a surface-only job into a full module replacement.
Why a mini stops charging or will not power on
- Cable and adapter: test a known-good charger first, since a tired cable mimics a dead connector exactly.
- Connector and flex: a worn Lightning or USB-C socket collects lint and bends its pins, so the tablet only charges at a single angle.
- Battery: once the cell stops retaining power, the tablet behaves as dead — there is not enough juice to complete a boot.
- Power controller: when this board-level circuit fails, the tablet takes no charge whatsoever; tracing it requires a microscope.
A battery that has swollen and lifts the display off the chassis
When the glass starts lifting along the edge, the cause is almost always a swollen battery pressing up from inside, not a loose frame. Inside a mini the cell is bonded to the aluminium shell; over time the pouch may expand, forcing the display module up and leaving a visible, tangible gap. Owners notice sudden shutdowns at 30–40% charge, a screen that rocks when tapped, or a case that no longer sits flush. A swollen cell should not be charged or pressed back into place, since the pouch can rupture and the device is safer powered off until it is opened.
Glass alone or a full display module for your iPad mini repair
The answer depends on which mini you own, because the display changed from two separate layers to one bonded unit partway through the line, and that decides whether glass alone is possible.
Where a glass-only replacement is possible among mini models
The first three minis use distinct touch glass and LCD components, so if only the surface is cracked while the image stays clean, just that layer gets swapped. On the first three generations of the mini, the digitizer is a separate sheet above the panel, so a spiderweb crack with a clean picture is a simple swap. On mini 4 and mini 5 the layers are fused into one laminated module, and on mini 6 the panel reaches every edge of the front. From mini 4 onward the layers are bonded, and trying to split them by hand destroys the LCD, so the workshop quotes a module instead of a glass swap. Ask which construction your model uses before agreeing to a quote — a glass-only price on a bonded mini is a sign the shop has not opened one.
What is different on the fourth to sixth generations
How display build and Touch ID differ across mini models| mini generation | Display construction | What we replace | Touch ID location |
|---|
| mini 2, mini 3 and mini | Separate glass and LCD | Glass alone if the LCD is intact | Home button (mini 3) |
|---|
| mini 4, mini 5 | Bonded module | Full display module | Home button |
|---|
| mini 6 | Bonded edge-to-edge module | Full display module | Top button |
|---|
Keeping Touch ID and the Home button working
The home button on a mini is paired to its board, so we move the original button onto the new glass instead of fitting a fresh one. That pairing holds on mini 3, mini 4 and mini 5, where the sensor lives in the Home button, and the button travels from the cracked assembly to the replacement module during the swap. A replacement button from another device will click and press but never unlock, which is why the pairing step is done before the screen is glued down. On mini 6 the sensor moved to the top button, so we check that press and unlock both respond before the device goes back to you.
How we run an iPad mini repair in Astana
The visit is short and predictable, and most of it happens in front of you, from the first message on WhatsApp to the moment you test the device yourself before leaving.
Send a photo via WhatsApp and receive a firm quote
Send a photo of the damage on WhatsApp and an engineer replies within 5 minutes with a price and a free time slot. The check-up takes a quarter of an hour, is performed while you watch and costs nothing even when you decline the repair; before any work begins, price, component, timing and warranty are locked into the receipt within 2 minutes. A courier can be called if you cannot come in yourself. Quoting from a picture works because the crack pattern and the model are visible in the shot, so the visit starts with a confirmed range rather than a guess — which is why iPad mini repair in Astana begins with a message, not a queue.
What we show you before the new component goes in
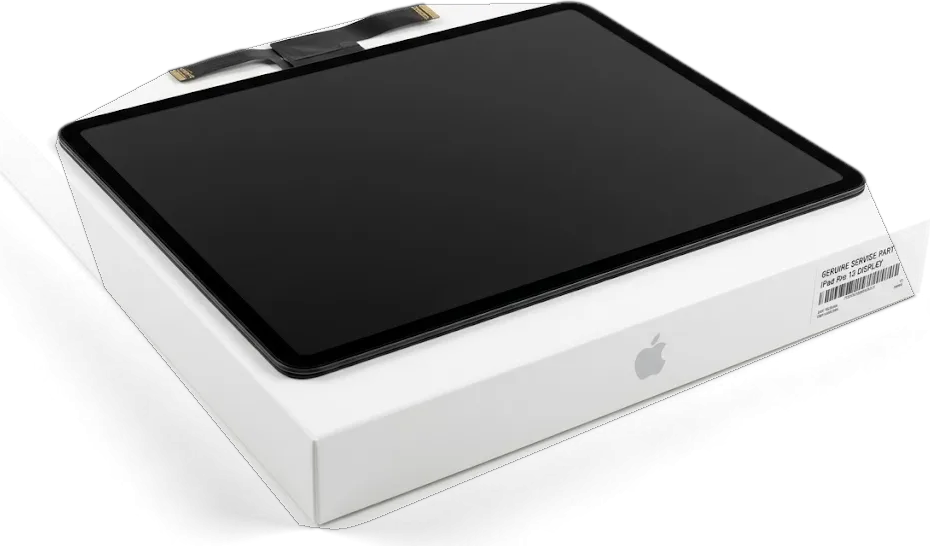
- Factory packaging: the replacement is opened in front of you in its sealed box, so the piece you paid for is the one that goes into the tablet.
- Original or aftermarket: both variants are shown to you for comparison, and 64% of customers choose the original one.
- Waiting area: coffee and Wi-Fi are available while the work is done, and 72% of repairs finish while the customer waits.
- Fixed on paper: part type, turnaround and warranty are written on the receipt before installation begins, so nothing changes mid-repair.
The check you run yourself before leaving
- True Tone: tilt the screen and confirm the display behaves as it did earlier.
- Cameras and microphones: take a shot on each lens and record a short voice note with the engineer.
- Speakers and charging: play a clip at full volume and plug in the cable to watch the charge indicator.
- Network: make a call and load a page on mobile data to confirm the antenna is connected.
- What you take home: the device returns with the receipt, warranty card and the old component.
OEM versus non-original components, and the scope of warranty coverage
Both options are legitimate, and the right pick depends on how long you plan to keep the mini and which functions matter most to you, so we lay out the differences plainly.
How an original panel and an aftermarket panel differ in use
A genuine display reproduces the same colours, brightness level and touch sensitivity the tablet originally had; a third-party panel may shift in colour temperature and respond differently to a light tap. A laminated module also affects how the glass sits against the digitiser, and that shows up in Pencil work — pressure and tilt read more evenly on an original-grade assembly. Colour drift on cheaper panels is usually mild, a few hundred kelvin, but it becomes obvious next to a phone or a monitor you trust. The brightness ceiling matters more outdoors, where a budget panel often tops out lower and washes out under direct sun. If the tablet is mostly used for books and streaming, the difference rarely shows; for Pencil drawing, though, the changed touch sampling rate is the first thing users report.
Cell choice and how long each option lasts
We fit either an original battery or a quality aftermarket cell, and 64% of our customers across all repairs choose the original part. The power pack inside the tablet is glued in under the display, so whichever you pick is bonded back into the same tight slot with fresh adhesive, and the panel has to come off cleanly either way. Given identical charging habits, a genuine battery keeps its rated capacity for longer, whereas a third-party cell may shed a few percent of runtime during the first year of daily cycling. Our engineers show the new component in its sealed packaging before it goes in, so you see exactly what is being fitted. Capacity on paper is a weak guide on its own, since two packs that fit the same slot can still age at different rates under identical charging.
What the receipt and the warranty card set out
- Part fitted: the receipt names the exact component, original or aftermarket, so there is no ambiguity later about what sits inside the mini.
- Turnaround: timing is confirmed in writing before the repair begins; iPad and MacBook jobs take between an hour and a day, with the precise slot given once diagnostics finish.
- Warranty: cover runs up to 1 year on the fitted part, and the card travels home with the device.
- Old part: the component we removed is returned to you, and keeping it beside the paperwork shows what was in the device before the swap.
Battery, charging and board work on a mini
Beyond the screen, the mini most often comes in for power problems, and these range from a five-minute connector check to board-level work that needs the microscope and a few days.
Replacing a glued-in cell without damaging the display
The battery sits under the display and is glued down, so we lift the screen with controlled heat before the cell can be reached and replaced. On every mini generation the panel is held by adhesive rather than clips, and the heat has to stay even across the whole surface — a local hotspot softens the glass faster than the glue and cracks it along the edge. We work on a heating platform, run a thin blade through the adhesive bead and only then disconnect the cell. The new power cell goes in with fresh adhesive strips, and the panel is pressed back under weight so it sits flush with the frame. Doing this at home usually ends with a cracked panel, which turns a simple swap into a battery plus module replacement in one go.
Ports, flex cables and the power IC
A mini that charges only at an angle or drops its connection usually has a worn socket or a damaged flex, and both are replaced as a single assembly. Up to the fifth generation the port is Lightning, and the mini 6 switched to USB-C, so the part differs by generation and we check the exact model before ordering. On the bench the inlet is checked for bent pins, lint packed into the opening and a loose solder joint where the flex meets the logic board. If a fresh inlet and cable still will not charge, the fault has moved to the power controller, which is a board-level task rather than a connector change. That work happens under the microscope, because the controller sits among components a millimetre apart.
Turnaround times and when an older mini is worth keeping
- Charging socket and flex: the assembly replacement is a while-you-wait task, finished in the waiting area with coffee and Wi-Fi.
- Battery replacement: glued-cell work runs longer than a socket swap but stays within the same visit for most minis.
- Board-level repair: a power controller or shorted rail goes under the microscope and takes one to three days.
- Water damage: cleaning plus diagnostics may take as long as two days — only after that do we give you a price.
Summary: iPad mini repair
A repair decision on a mini comes down to a few checks you can make before anyone opens the device. The points below are what matters most.
- Model first: check which mini you own, since the display construction decides whether glass alone is possible.
- Lifting display edge: a raised edge points to a swollen battery, and the tablet should stay powered off until it is opened.
- Charging faults: a non-charging tablet is checked in order from cable to port to cell to board.
- Component type: original and aftermarket parts differ most in colour, touch response and how they age.
- Documents: ask for the part to be shown before fitting and keep the receipt, warranty card and old component.














 MacBook
 iMac
 Mac mini and Studio
 Apple Watch
 AirPods
 Apple Pencil
 Apple TV
 HomePod