The HomePod 1 features a built-in supply and a non-removable cord, so when a unit is dead, the cause is typically energy delivery or the logic board, not the speaker itself.
Power, Cable or Board — Where the Fault Usually Sits
When a first-generation speaker stays dark and gives nothing when plugged in, our technicians inspect three points in sequence — the moulded cable, the power section inside, and the logic board. Since the cord is sealed into the housing, damage close to the strain relief or a bent plug shows no outward sign, yet the speaker behaves as if completely without power. The next link is the internal power section, where a shorted rail creates the same dead silence even though the drivers remain fine. Faults on the board itself are checked last and require magnification to trace. A device that blinks briefly and then dies typically indicates the power section rather than the cable, which alters both the repair route and the part we quote.
How We Tell a Wi-Fi Drop from a Failing Speaker
When the speaker vanishes from the Home app on a single network yet works reliably on another, the router is at fault; when it disappears everywhere, our attention turns to the wireless module and the logic board. We ask which frequency band the router uses, how far away the device stands, and whether other gadgets also lose signal in that spot. Next we connect the speaker to a different network in the workshop and monitor it for repeated dropouts during a short test. A module that warms up and loses connection under load behaves differently from a router that simply cannot hold the band. Trying a different network before disassembly spares the customer an unneeded repair and shows within minutes whether the problem lies inside the speaker.
Symptom to Fault — A Quick Reference
Symptom-to-component map for first-generation units| Symptom | Likely component | What we check |
|---|
| No light, no reaction | Cord, supply, mainboard | Energy delivery in order |
|---|
| Hiss or rattle on bass | Woofer, housing, mesh | Driver and mounting |
|---|
| Drops off Wi-Fi | Wi-Fi module, mainboard, router | Second network test |
|---|
| Siri ignores voice | Microphone array | Mic response test |
|---|
| Top panel unresponsive | Touch panel, mainboard | Panel and ribbon |
|---|
Audio Defects in HomePod 1 Repair and Their Origins
A rattle on bass is the most common sound complaint on the first-generation HomePod, and it rarely means the whole speaker is gone — the cause is usually narrower than owners expect.
Hiss, Rattle or Distortion — Reading the Symptom
A damaged woofer distorts at every volume, while a loose housing element rattles only at higher bass levels — we separate the two on the bench before quoting. On the first-generation HomePod the bass driver sits in a sealed chamber below the seven-tweeter ring, and a torn surround produces a constant buzz even at low output. A loose mesh, a shifted foot or a screw that lost tension instead answers the low-frequency excursion and buzzes only when the speaker pushes air hard. We listen with the grille on and then off, and compare the two passes. Playing a known heavy track at three volume steps tells us more in two minutes than a full teardown.
Woofer, Tweeters and Mesh — What Can Be Replaced
- Woofer: the four-inch bass driver is the part most often swapped when the surround is torn.
- Seven tweeters: the high-frequency ring is replaced as a whole or by segment when one channel goes crackly.
- Mesh and grille: the acoustic fabric is cleaned, re-tensioned or refitted when it has loosened.
- Housing: a mounting point that has come loose is repaired so the shell stops vibrating.
- Acoustic path: we clear dust from the chamber, since trapped debris mimics a blown speaker.
Original or Aftermarket Sound Parts
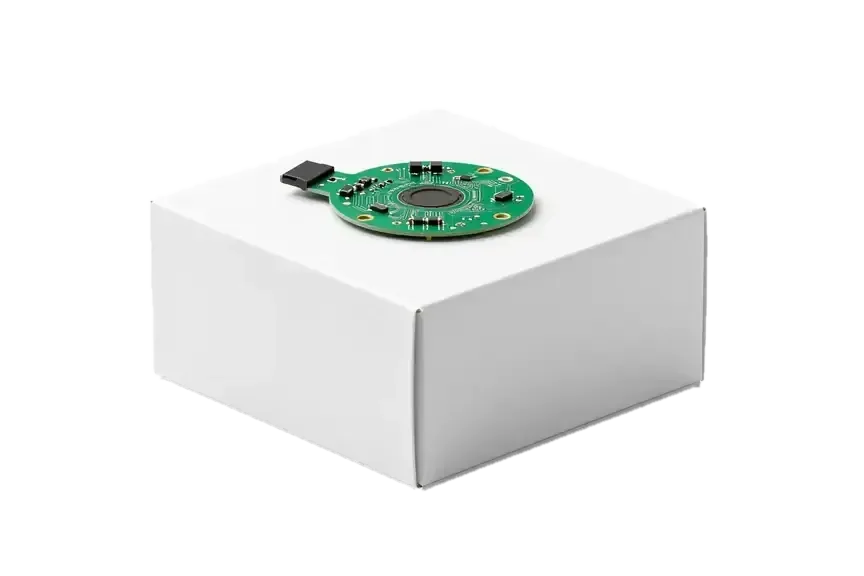
We offer both original and aftermarket sound components, and the choice is fixed on the receipt before we open the speaker. The part arrives in factory packaging and is shown to you prior to installation, so you see exactly which component goes into the housing. An aftermarket woofer can restore clean sound at moderate volume, but an original one holds tuning closer to the factory curve at high output. 64% of customers choose an original part, and the rest pick aftermarket when the budget matters more than output headroom. The receipt also records the turnaround and the warranty, up to 1 year, so nothing about the component is left verbal. Ask which part is being fitted and listen to the device at your usual volume before you leave.
Siri, Touch Panel and Software Glitches in HomePod 1 Repair
When the speaker plays fine but ignores commands or its top surface stops responding, the fault sits in the microphone array, the touch layer or the software layer.
When Siri Cannot Hear You
If Siri stops responding to voice but audio still plays, we test the microphone array first, since a failed mic is the usual cause on this model. Six microphones sit around the base, and each one feeds the voice-recognition stage; a single dead element is enough to make commands unreliable. We run a live test in front of you — you speak at normal volume from where you usually stand, and we watch which elements register. A mic that works at close range but fails across the room often signals one dead element rather than the whole array, which narrows the repair. Keep in mind the array is soldered to a shared ribbon, so the fix is a targeted one rather than a full harness swap.
Touch Panel and Top Light Faults
An unresponsive top surface or a flickering light usually traces to the touch layer or its ribbon connection, which we check together with the board. This upper assembly handles volume, play and pause through capacitive touch, and the same part carries the status LED that glows when Siri listens. We inspect the ribbon for creases and oxidation, then probe the connector on the logic board — a loose connection there mimics a dead sensor. A surface that responds to taps but shows no light is often a separate LED fault, so we test touch and illumination independently. That distinction matters: reflowing a connector is quicker than replacing the whole top assembly, and it keeps the original finish of the speaker intact.
Stuck on an Update and What Happens to Your Home Setup
A speaker stuck partway through an update is normally brought back by restoring its software, and your Home app preferences and stereo pair are connected again once the work is done. We link the device to a service Mac, install a fresh firmware image and monitor the boot sequence; the majority of frozen units recover this way with no hardware intervention. Before handing it over, jot down which room it serves and whether it works as a stereo pair or as an Apple TV companion. Please keep the iPhone signed into the same Home account, since adding the speaker back goes faster when the original setup remains on the phone. Should the stereo pair come apart after a reset, re-pairing both units takes only a few minutes on that same account.
How We Perform a HomePod 1 Repair in Astana
Everything happens quickly and openly: we inspect your device free of charge while you watch, give you a receipt that fixes the agreed terms, and fix most devices while the client waits in our lounge area.
Free Diagnostics and the Receipt That Locks the Terms
The checkup costs nothing and lasts a quarter of an hour while you watch, while the cost, component, timing and guarantee get locked onto the receipt roughly 2 minutes before work begins. The engineer opens the unit at the bench, shows the failed component and explains whether an original or an aftermarket part fits your case; 64% of customers pick the original. We then print the terms — part type, turnaround, warranty up to 1 year — and you sign before any screw comes out. Because the terms are locked on paper first, a part that turns out to be the wrong fit never changes the agreed scope mid-repair. Ask to keep the receipt copy with the warranty card — it is the document you show if the speaker misbehaves months later. Every HomePod 1 repair in Astana that we take on follows this same route, so you always know the terms before work begins.
What We Check Before the Unit Goes Back to You
Post-repair verification steps and their timing| Check | What we confirm | Time |
|---|
| Sound at three volumes | No rattle or distortion | ~2 min |
|---|
| Siri and microphones | Voice response across the room | ~2 min |
|---|
| Touch panel and light | Taps and illumination work | ~1 min |
|---|
| Wi-Fi and Home app | Speaker reconnects | ~2 min |
|---|
| Handover | Receipt, warranty card, old part | ~3 min |
|---|
Waiting, Courier and Payment Options
Many fixes are done during your visit — you can relax in the lounge with coffee and Wi-Fi, arrange a courier, and settle the bill via Kaspi, card or cash. Over 11 years our team has completed more than 46,000 repairs, and 72% of orders are finished with the client on site instead of being left until the next day. Microscope work is the exception — it takes 1–3 days, and after liquid damage diagnostics may extend to two days. Send a photo of the damage on WhatsApp first and you will get a price plus a free time slot within 5 minutes, keeping the actual visit brief. On Saturdays, Sundays and public holidays we are open 11:00–18:00, convenient for owners who cannot visit on a weekday.
HomePod 1 Repair Components, Duration and Final Result
The first-generation unit differs from later models in ways that shape the repair — its lead is fixed to the body and its power supply sits inside, so the component list and timing follow from that.
How the First-Generation Unit Differs from Later Models
The original HomePod has a non-removable lead and a built-in power supply, while the second-generation model uses a detachable connector and the mini routes its cord out of the housing. On the first model the power lead is moulded into the base, so a damaged length is not a swap-and-go job: the base assembly has to come apart and the internal supply is exposed at the same time. The second-generation separates the two — pull the connector and fit a fresh length in minutes. The mini runs its cord through the shell as well, though its smaller housing means less disassembly around the supply. A detachable connector makes a power fault cheaper to fix on later models, which is why owners of the earlier unit should confirm the fault before assuming a simple swap.
Repair Times and the Warranty You Take Home
Many repairs are done in 20–40 minutes right in front of you, microscope work needs 1–3 days, and each job comes with a warranty of up to 1 year. For 72% of orders the client stays in the lounge with coffee and Wi-Fi while we work, and the details — part, timeframe and coverage — are printed on the receipt before we start. Microscope jobs are the exception to same-day service: tracing repair under magnification cannot be hurried without endangering the connection, so we schedule it and notify you as soon as it clears the 32-function test. That is the only situation in which we ask you to leave the device, because rushing the trace work puts the connection at risk.
Original or Aftermarket — Choosing Your Component
You pick either a genuine part or a third-party alternative, the replacement is displayed in its factory box before fitting, and the removed part is returned to you. We unbox it in your presence so the label corresponds to what the receipt lists, and the component taken out is bagged and given back instead of being kept. In our workshop 64% of clients opt for the genuine part, typically to preserve the original sound signature and touch response. A third-party part keeps the cost down, whereas a genuine one stays closer to factory performance through years of everyday use — the choice is yours to make.
Summary: HomePod 1 repair
A first-generation HomePod rarely fails on a single obvious fault. Below are the patterns worth remembering before you decide what to do with the device.
- Fixed cable and internal supply: a dead speaker usually traces to the permanently attached cord or the built-in power board, not the audio hardware.
- Bass rattle: a rattle on low frequencies points to the woofer or housing, and the fault is often narrowed before a full teardown.
- Wi-Fi drops: connect the device to a different network first, so a router issue can be told apart from a faulty wireless module.
- Siri and touch faults: these sit in the microphone array or the top panel and are diagnosed independently of the sound chain.
- Parts and timing: the sealed cable and the internal power board determine both the list of components and the duration of the repair.








 iPad
 MacBook
 iMac
 Mac mini and Studio
 Apple Watch
 AirPods
 Apple Pencil
 Apple TV
